|
This
guide is intended to show you how to
make two vivariums , one 3 foot (914mm) and the other 2.5 foot (762mm), from
1 piece of 8 foot (2438.40mm) x 4 foot (1219.2mm) x 5/8 of an inch (15mm) board.
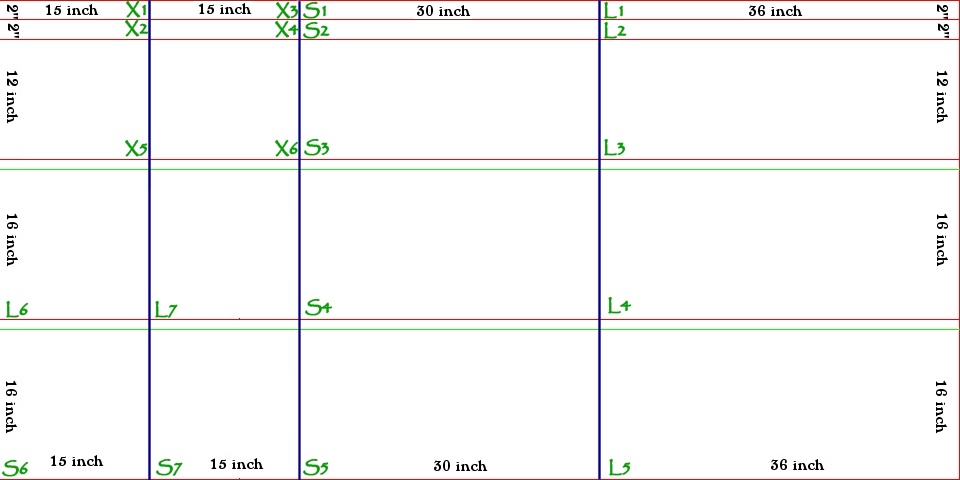
At the bottom of this page is an image labelled Plan A
which shows where you should get your local DIY store to cut the board. To view
a larger image of the plan just left click on it. The first thing to do is click
on the plan, get an A4 printout of it, then print out the list of the other
required materials, take both the plan and the materials list along to your local
DIY store.
1) Cutting and Collecting:
Once you are at the DIY store find a nice piece of 8x4 foot board and take it over to the cutting machine, examine the plan you have printed out and orientate it as shown below.
The way these cuts are described should allow you to get the board cut with the minimum amount of cuts from the machine, I have described it this way because my local store charges extra per cut made after the fourth one.
This should be very simple to follow, cut horizontal Red lines first,
then get the operator to stack all of the board together then cut the Blue vertical lines.
You will be expected to read the cuts out to the operator, ie 2-inch cut horizontally etc etc. All you need to do now is collect the items on the materials list, pay for everything and take all of the components home.
2) Checking and sorting
Once
you have your components home then sort the cut board in to the two vivariums parts and place the scrap pieces somewhere out of the way so you dont get confused in the assembly phase.
I have listed below the component pieces and which viv they actually go towards building.
| Scrap Components |
Small Viv Components |
Large Viv Components |
All Components
Marked X are scrap |
S1, S2
Front supports |
L1, L2
Front supports |
All Components
Marked X are scrap |
S3
Back |
L3
Back |
All Components
Marked X are scrap
|
S4, S5
Top and Bottom |
L4, L5
Top and Bottom |
All Components
Marked X are scrap |
S6, S7
Left and Right sides |
L6, L7
Left and Right sides |
Store the scrap pieces, they will come in useful for another project!
3) Pre assembly
Before we start to assemble the large vivarium, find the parts labelled L1 and L2.
Now take a saw and cut 30mm off the end of each piece. Check all pieces of the vivarium have smoothed edges, if not smooth them off with a piece of sandpaper.
4) Assembly of Large Viv
| A) Attach front support. |
|
|
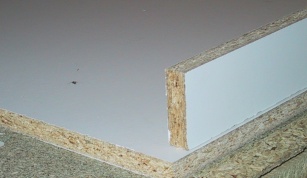
Due to the way that the wood is cut
some of it is lost as saw dust, as a result of this one of the pieces labelled
either L4 or L5
will be slightly deeper than the other, this larger piece is your base. Take
this piece and lay it flat on your work area, then take front support piece
L1 and place it at the very front of the base in the centre orientated
so that the piece is vertical ie 15mm deep and 50mm high. You should note that
the piece has a gap either side of it measuring 15mm when it is centred. Once
it is correctly positioned mark where the piece sits on the base with a pencil. Then glue piece L1 into position and fix into the base with 3 screws coming up through the base on the left, right and centre.
|
| B) Attach side panels to the base. |
|
|
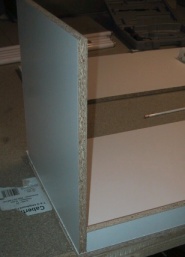
When you look at parts L6 and L7 you will notice they are not square, the longest side (16inch) is positioned upwards leaving a gap at the back of the viv where the base protrudes. Fasten the sides into place with 3 screws (left, right and centre) and touch of glue.
|
| C) Attach the back piece. |
|
|
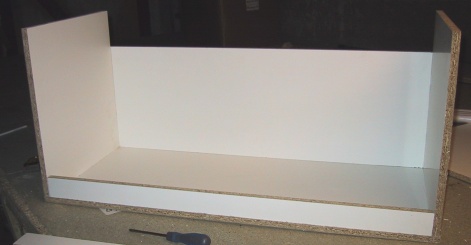
When you Attach the back piece, L3, into place it rests on the base in the gap left at the rear of the viv. The gap goes to the top of the viv. Fasten it into place with 3 screws coming through the base (left, right and centre) and 3 screws going through it into the side panels (top, middle and bottom).
|
| D) Fix the front support at the top. |
|
|
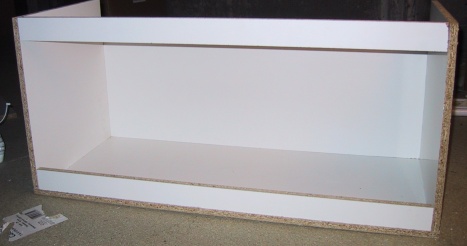
When you affix the front top support, L2, use two screws, top and bottom at each side, this prevents the piece from spinning. I would advise drilling a pilot hole where the screws will go as this particular piece is prone to splitting.
|
| E) Fix the top into place. |
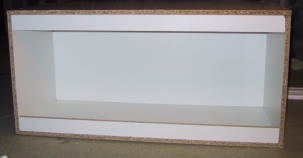
|
|
The top, L5, is fastened by a total of 7 screws, 3 going into each side piece (left, right and centre) then one more through to the centre of the front support.
|
| F) Attach the wire. |
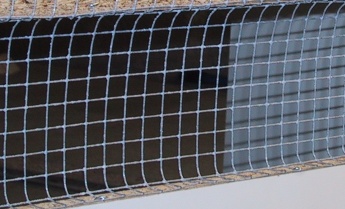
|
|
Cut and affix the wire mesh to the back of the viv over the gap between the back piece and the top using the 15mm wire staples.
|
| G) Glue the door track. |

|
|
Using the multipurpose adhesive, glue into position the 4mm sliding door track. Align the track with the front of the viv, the deeper piece of the track goes to the top of the vivarium.
|
| H) Seal the vivarium. |

|
|
Seal the vivarium on the inside with your silicon sealant.
|
| I) Iron on edging strip. |

|
|
I only use the edging strip on the front of the vivs this takes about 3 rolls of edging strip. Preheat your iron, while the iron is heating line up a piece of edging strip against the side you wish to finish, then cut to the correct length. Once the iron is heated run it over the edge of the viv you want to cover, this heats it up a little and allows the glue on the strip to start to melt. Line the strip up over the edge, then cover the strip with some brown paper, and run the iron over it until all the strip is adhered. Once the strip has cooled trim the edge with a very sharp Stanley/craft knife.
|
5) Assembly: Small Viv
There are very few differences, except length of the parts, with the assembly of the small viv, just follow the instructions for the large viv assembly and you should have it built very quickly.
| Other Materials |
| 35mm wood screws |
15mm iron on edging strip |
| 15mm wire staples |
Multipurpose adhesive |
| Silicon Sealant |
sheet of 10mm (or smaller) wire mesh |
| tube of wood glue |
4mm sliding door track |
Plan A

http://www.leopardgecko.co.uk
|


